Intial Fuselage Progress

Initial Dimensions

Initial Dimensions
Wing Step 1

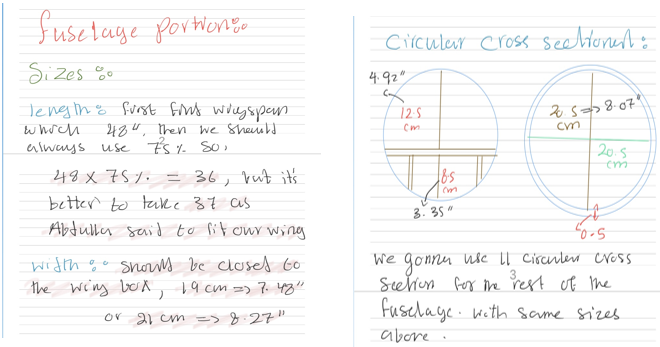
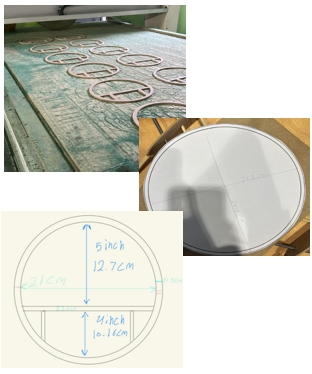
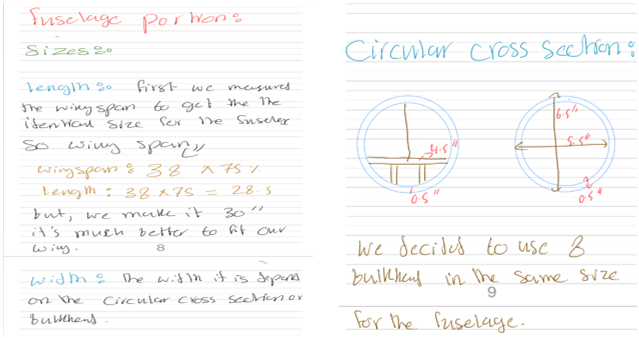
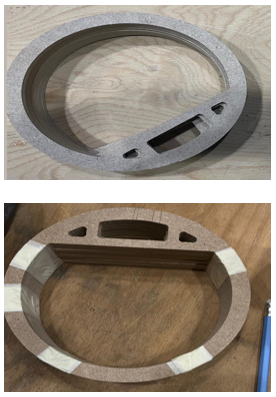
Our first step in building the fuselage was creating a detailed sketch to determine accurate dimensions and ensure consistency in the final design. We developed two fuselage shapes: one fully circular and another with a circular form featuring a 2 cm flat edge at the bottom to improve stability and ease assembly. After finalizing the designs, we transferred them to a CNC machine, which precisely cut each piece. This accuracy ensured uniformity, proper alignment, and a strong, aerodynamic structure, setting a solid foundation for the fuselage construction.

Wing Step 2

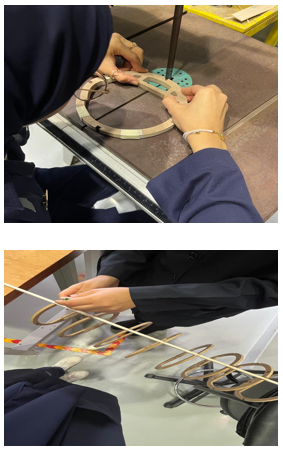
In the second step of our process, we began filing the fuselage to create space for adding the support rods. However, we encountered some challenges during this stage. One of the main difficulties was that the fuselage had two different sizes, which made it tricky to determine the correct areas to file. Ensuring a precise and even fit required extra effort, as we had to carefully assess and adjust our approach to avoid over-filing or weakening the structure.

Wing Step 2

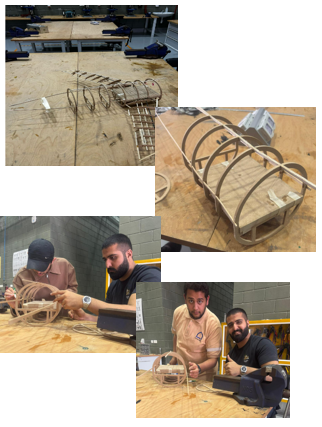
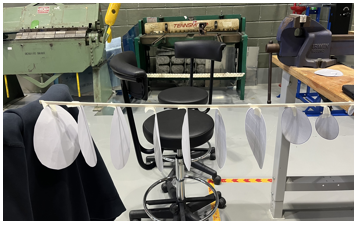
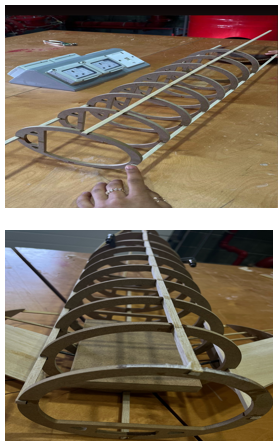
In the final step, we assembled the fuselage with great precision to ensure a proper fit. Each part of the fuselage needed to be exactly 3 inches apart, so we carefully measured and aligned every component to maintain consistency. It was crucial to ensure that all parts were positioned in the same direction to achieve a uniform structure. Additionally, we placed the wing box inside the fuselage to refine the dimensions and enhance the overall appearance, making sure everything was well-fitted for the best possible result.


Improvement

New dimensions

Initial Dimensions
Wing Step 1

We began by redesigning the aircraft fuselage, as the original version was disproportionately large compared to the wing. This mismatch affected both the visual balance and aerodynamic accuracy of the model. To address this, we took new, more accurate measurements and reduced the overall size of the fuselage to better match the scale of the wing.

Using CAD software, we designed a circular cross-section that would define the shape of the new fuselage. The cross-section was carefully scaled and printed on an A2 sheet, with one-eighth of the section printed at full scale. This segment provided enough detail to evaluate the proportions without printing the entire cross-section.

Wing Step 2

To test the new dimensions, we constructed a paper prototype based on the printed section. This prototype allowed us to visually assess how the new fuselage size aligned with the existing wing. We also measured the spacing between each circular frame (bulkhead) to plan the full-length structure. After assembling the prototype, we confirmed that the revised dimensions were well-suited to the wing’s size.

Wing Step 2

Next, we moved on to shaping the nose and tail sections. We approximated the necessary measurements and created three identical circular profiles for both the front and rear ends. These were printed and tested using wood to ensure structural compatibility. The dimensions were found to fit well with the rest of the fuselage, so we finalized all the measurements for production.

In parallel, we adjusted the wing box, the structural section where the wing connects to the fuselage, to match the new circular profile. After resizing all components, we rechecked the wingspan and overall proportions to ensure the updated fuselage worked harmoniously with the rest of the aircraft model.

Wing Step 2

Once all the measurements were verified, we began constructing the actual fuselage. The process started with the preparation of eight bulkheads, each representing a circular cross-section along the fuselage length. In each bulkhead, we cut four notches to match the diameter of the wooden support sticks that would serve as the fuselage’s main structural frame. For precision, we used a cutting machine and then refined the edges with sandpaper to ensure a snug fit.

After preparing the bulkheads, we aligned and spaced them evenly based on our earlier measurements. Then, four long wooden stranger were inserted through the notches, connecting all eight bulkheads along the fuselage’s length. These wooden stranger were secured with superglue, forming a rigid and accurate frame that defined the final shape of the fuselage.